
By Chris Pranger
Session 8: Johnny Jones to Yaridovich
Darling it’s better down where it’s wetter. That’s what Sebastian the crab in The Little Mermaid says anyway. Is it really better being at the bottom of the Sea in a Sunken Ship with a shark pirate captain waiting for me? Only time will tell.
I’m happy to say I’m staying consistent with yoga. It’s simple enough since I’m doing 10-minute yoga classes on my wife’s phone. I believe it’s an app called Yoga Studio. It’s pretty good! I’ve moved into the intermediate yoga classes, mostly just searching for variety since I’ve done the beginner classes enough times. I think I like yoga, but it can get really difficult when you’re turned away from the phone and the instructions aren’t super clear. “Stretch your right palm into the air. Now, place it on your left knee. Turn to your partner’s left and stand on your third leftmost toe while breathing through your right lung.” Yoga at least usually leaves me with enough energy to do something else, so I got the gumption for some more exercise bike with Super Mario RPG.
As we last left off, I was deep in the Sunken Ship somewhere in the Sea, chasing down the fifth star. There is a chest right past the save point, and if memory serves me well, there is a monster in said chest. Sure enough, instead of just getting an item, I get to fight a monster chest, a favorite creature in RPGs and especially Final Fantasy games. At this point I’ve only had one other monster chest encounter, which wasn’t overly eventful since it was the first one relatively early in the game, I want to say in Kero Sewers. The quirk with these monster chests is that other monsters hide in the chest and pop out as the battle commences.
This particular battle spawns four mini Goombas, which seem harmless enough but each one is a mean cuss and they all make a beeline for Toadstool. She just can’t catch a break, no matter how often she heals. Each of these mini Goombas manage to chomp nearly 30 HP from her, forcing me to use at least one more Pick Me Up before this battle is done. Thankfully her time of getting riggity-wrecked is nearly at an end because immediately following this monster encounter she levels up and finally reaches 100 HP, a milestone that to me feels like she’s at least up to the necessary level to play in the big leagues.
Meanwhile, I’ve realized that I’ve hit the maximum amount of coins again, which is only 999. Currency in Super Mario RPG is fairly inconsistent as much of the game you either feel like you have way too much or far too little. This is at least the third time I’ve reached the maximum amount of coins, with the first being in the mines during the Moleville section. Claiming the third star opened up a few purchasing options in Moleville that eat up a ton a coins, which was perfect. Here though, I’m still stuck in the Sunken Ship, so I’m just wasting coins.
Still, I’m fighting every single enemy I can, mostly to continue that steady level climb. I’d wager I’m severely over-leveled at this point since the only party member struggling is Toadstool, the character who joined late and started around three levels behind. We’re back to underwater enemies as the bottom of this ship is flooded, so yet again I’m fighting Mr. Kippers (which look like Cheep-Cheeps) and Bloopers. Except excuse me, I was incorrect. Despite looking and moving like a Blooper, the enemies here are called “Bloobers.” All those nice things I said about Ted Woolsey? Eh, it still stands, but I’m going to call him Tim Woolsey from now on in mild protest.
Before the fight with Johnny Jones I switch my team slightly, swapping Toadstool with Mallow. Reason being, Mallow can heal in a pinch, but his main gift is his excellent Special Attack coverage. If Toadstool has the best healing move with Group Hug, Mallow has the best target-all Special Attack with Thunderbolt, which hits all enemies for a pretty good amount. This utterly ravaged Mack and his Shysters since I was able to pop all the goonies with a single Thunderbolt.
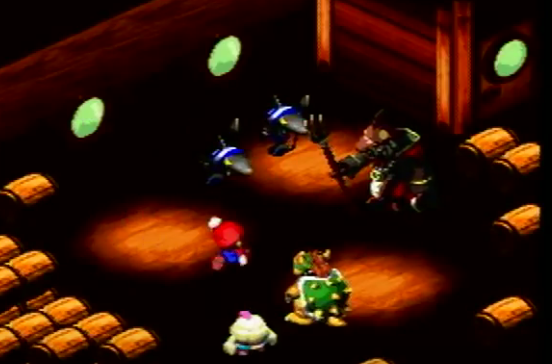
Going against Johnny Jones starts pretty basic with you squaring off against the shark pirate and four of his blue-bandanaed lackeys. Mallow comes in hot here with his Thunderbolt and within two turns, it’s just us against Johnny. After a few more hits, the battle changes and Johnny challenges Mario to a one-on-one fight, which overall isn’t very difficult due to my over-leveling. The fight is, however, still very memorable.
In fact, a lot of the most memorable fights in the game are due to them having something to them beyond the simple “fight me and be done with it” cliche. Sure, there are a few boss fights that sort of zip by and then go unnoticed, like the first boss fight against the Hammer Bros at the end of the first area, or...actually, that might be the only relatively unmemorable boss fight for me. Every other boss has something that makes them unique and stand out. Even King Calamari, a relatively easy boss sticks in my mind because your party moves across a long room, slowly making their way to his face. Here against Jonathan Jones, it may not be hard, but seeing Bowser and Mallow on the sidelines cheering me on while Johnny’s shipmates do the same adds a layer to this that I really enjoy. Plus, Johnny is a really well-designed character. I love his subtle pirate motif, I like the way his traditional hook hand is sort of on a small spring, I like how he has a trident that can spin and spring out. I wish he could be a party member, and if I ever got put in charge of a sequel, I’d make sure he was a party member (also Booster of course).
Once Johnny is defeated, he willingly hands over the fifth star. We part ways and I have the option to return to Seaside to finish this section but instead I take a detour to Marrymore to nab an item I ignored on my first pass: the B’tub Ring. It’s an item that Toadstool and only Toadstool can equip, and its item description just says “you’ll win her heart with this,” but it’s not clear what it actually does. Turns out it’s part of a secret item that I absolutely missed in every other playthrough, so I’m nabbing it now. Hey, I’ve got a ton of coins to burn through anyway.
Those coins weighing me down, I also take a little stop in the Marrymore Hotel and stay in the suite, which earns me a Flower Tab and a Max Mushroom. It’s also cute that the bellhop offers you a drink menu and stays in your room until you either excuse him or give him a tip (why not, the kid earned it). You can also walk through some doors in your room to the bathroom. Mario will disappear and you’ll hear running water before presumably Mario begins whistling his own theme. It’s extremely cute, and just gets cuter when Mario exits the shower beet red from the steam. It’s just a really nice touch.
After some time spent fighting random enemies on Star Hill to give Toadstool at least one more level, I return to Seaside where the elder and the townsfolk greet me and reveal that they’re evil and want the star. This is no real shocker, and if I don’t give them the star they’ll run off to torture the real town elder via tickling. I hand over the star as they rush off to make their escape at sea.
I’ve switched back to Mallow for this fight, forgetting that I usually have both Mallow and Toadstool since the boss here isn’t actually a pushover, even when over leveled. Instead, I have Bowser and Mallow joining Mario, which will make things a bit more complicated. The fake elder and townspeople are huddled around an overlook by the sea, saying that their ride is late. Seeing Mario, they determine they’ll have to swim for it, but Johnny pops out of the water with his crew, blocking their exit. Seeing that they’ll have to fight their way out, the fakes swarm together and reveal their true form: Yaridovich.
I have to give Squaresoft credit, Yaridovich is actually a pretty intimidating true form. He’s based roughly on a spear, with a long, menacing metal form. The backdrop for the fight is also pretty stunning, taking place on a coastal cliffside at sunset. Everything about this character’s design and this fight’s setting, including the excellent buildup, is so well executed.
The fight itself is no joke. Yaridovich has some beastly special moves of his own, including Water Blast, an attack that hits everyone in the party for over half health. This is where I may have made an error with Mallow and Bowser as I wanted Mallow for his Thunderbolt and Shocker Special Attacks, but Toadstool is really necessary for keeping everyone at full health. Instead of laying a constant magical pounding, Mallow is relegated to healer, slowing using HP Rain on each party member as their status becomes critical. Bowser even has to step in and give Mallow a Mid Mushroom at one point in the fight just to keep him alive.
Yaridovich’s other signature technique is his ability to split into two identical copies, with the mirage form being weaker overall but having access to the attack Meteor Blast, which is more or less as strong as Water Blast, if not more so. Still, Mallow manages to pop off a Thunderbolt attack, letting me see which Yaridovich takes less damage, revealing the true enemy and allowing my team to wallop him but good.
Smithy’s lieutenant defeated, Mario reclaims the fifth star and a little bit of narration points out that Smithy is now officially making a bid for the stars, which adds a new layer to all of this. Once again, the story isn’t as simple as just “evil guy came to rule the world with the seven stars.” Rather, Smithy is a villain who just loves waging war, and upon entering Mario’s realm he accidentally sent the seven stars scattering. Now that he’s learned exactly what they do, he wants them, lining up both of your main goals into one: stop Smithy from getting the seven stars.
Johnny has dove back into the sea, but not before leaving a note to let us know we’re still shipmates ‘til the end. I wish Johnny came in later for one more triumphant assist, but there are bigger fish to fry. Namely, all of Seaside’s shops are open again! WOO! Time to spend all these coins! I grab some new weapons for Toadstool, Mallow, and Geno, and then it’s time to head out in search of the sixth star.
This next section is admittedly actually really beefy, with from what I can see, probably four major parts coming up, if not more. There’s a lot in store, so next time, we set off for Land’s End!
Session 8: Johnny Jones to Yaridovich
Darling it’s better down where it’s wetter. That’s what Sebastian the crab in The Little Mermaid says anyway. Is it really better being at the bottom of the Sea in a Sunken Ship with a shark pirate captain waiting for me? Only time will tell.
I’m happy to say I’m staying consistent with yoga. It’s simple enough since I’m doing 10-minute yoga classes on my wife’s phone. I believe it’s an app called Yoga Studio. It’s pretty good! I’ve moved into the intermediate yoga classes, mostly just searching for variety since I’ve done the beginner classes enough times. I think I like yoga, but it can get really difficult when you’re turned away from the phone and the instructions aren’t super clear. “Stretch your right palm into the air. Now, place it on your left knee. Turn to your partner’s left and stand on your third leftmost toe while breathing through your right lung.” Yoga at least usually leaves me with enough energy to do something else, so I got the gumption for some more exercise bike with Super Mario RPG.
As we last left off, I was deep in the Sunken Ship somewhere in the Sea, chasing down the fifth star. There is a chest right past the save point, and if memory serves me well, there is a monster in said chest. Sure enough, instead of just getting an item, I get to fight a monster chest, a favorite creature in RPGs and especially Final Fantasy games. At this point I’ve only had one other monster chest encounter, which wasn’t overly eventful since it was the first one relatively early in the game, I want to say in Kero Sewers. The quirk with these monster chests is that other monsters hide in the chest and pop out as the battle commences.
This particular battle spawns four mini Goombas, which seem harmless enough but each one is a mean cuss and they all make a beeline for Toadstool. She just can’t catch a break, no matter how often she heals. Each of these mini Goombas manage to chomp nearly 30 HP from her, forcing me to use at least one more Pick Me Up before this battle is done. Thankfully her time of getting riggity-wrecked is nearly at an end because immediately following this monster encounter she levels up and finally reaches 100 HP, a milestone that to me feels like she’s at least up to the necessary level to play in the big leagues.
Meanwhile, I’ve realized that I’ve hit the maximum amount of coins again, which is only 999. Currency in Super Mario RPG is fairly inconsistent as much of the game you either feel like you have way too much or far too little. This is at least the third time I’ve reached the maximum amount of coins, with the first being in the mines during the Moleville section. Claiming the third star opened up a few purchasing options in Moleville that eat up a ton a coins, which was perfect. Here though, I’m still stuck in the Sunken Ship, so I’m just wasting coins.
Still, I’m fighting every single enemy I can, mostly to continue that steady level climb. I’d wager I’m severely over-leveled at this point since the only party member struggling is Toadstool, the character who joined late and started around three levels behind. We’re back to underwater enemies as the bottom of this ship is flooded, so yet again I’m fighting Mr. Kippers (which look like Cheep-Cheeps) and Bloopers. Except excuse me, I was incorrect. Despite looking and moving like a Blooper, the enemies here are called “Bloobers.” All those nice things I said about Ted Woolsey? Eh, it still stands, but I’m going to call him Tim Woolsey from now on in mild protest.
Before the fight with Johnny Jones I switch my team slightly, swapping Toadstool with Mallow. Reason being, Mallow can heal in a pinch, but his main gift is his excellent Special Attack coverage. If Toadstool has the best healing move with Group Hug, Mallow has the best target-all Special Attack with Thunderbolt, which hits all enemies for a pretty good amount. This utterly ravaged Mack and his Shysters since I was able to pop all the goonies with a single Thunderbolt.
Going against Johnny Jones starts pretty basic with you squaring off against the shark pirate and four of his blue-bandanaed lackeys. Mallow comes in hot here with his Thunderbolt and within two turns, it’s just us against Johnny. After a few more hits, the battle changes and Johnny challenges Mario to a one-on-one fight, which overall isn’t very difficult due to my over-leveling. The fight is, however, still very memorable.
In fact, a lot of the most memorable fights in the game are due to them having something to them beyond the simple “fight me and be done with it” cliche. Sure, there are a few boss fights that sort of zip by and then go unnoticed, like the first boss fight against the Hammer Bros at the end of the first area, or...actually, that might be the only relatively unmemorable boss fight for me. Every other boss has something that makes them unique and stand out. Even King Calamari, a relatively easy boss sticks in my mind because your party moves across a long room, slowly making their way to his face. Here against Jonathan Jones, it may not be hard, but seeing Bowser and Mallow on the sidelines cheering me on while Johnny’s shipmates do the same adds a layer to this that I really enjoy. Plus, Johnny is a really well-designed character. I love his subtle pirate motif, I like the way his traditional hook hand is sort of on a small spring, I like how he has a trident that can spin and spring out. I wish he could be a party member, and if I ever got put in charge of a sequel, I’d make sure he was a party member (also Booster of course).
Once Johnny is defeated, he willingly hands over the fifth star. We part ways and I have the option to return to Seaside to finish this section but instead I take a detour to Marrymore to nab an item I ignored on my first pass: the B’tub Ring. It’s an item that Toadstool and only Toadstool can equip, and its item description just says “you’ll win her heart with this,” but it’s not clear what it actually does. Turns out it’s part of a secret item that I absolutely missed in every other playthrough, so I’m nabbing it now. Hey, I’ve got a ton of coins to burn through anyway.
Those coins weighing me down, I also take a little stop in the Marrymore Hotel and stay in the suite, which earns me a Flower Tab and a Max Mushroom. It’s also cute that the bellhop offers you a drink menu and stays in your room until you either excuse him or give him a tip (why not, the kid earned it). You can also walk through some doors in your room to the bathroom. Mario will disappear and you’ll hear running water before presumably Mario begins whistling his own theme. It’s extremely cute, and just gets cuter when Mario exits the shower beet red from the steam. It’s just a really nice touch.
After some time spent fighting random enemies on Star Hill to give Toadstool at least one more level, I return to Seaside where the elder and the townsfolk greet me and reveal that they’re evil and want the star. This is no real shocker, and if I don’t give them the star they’ll run off to torture the real town elder via tickling. I hand over the star as they rush off to make their escape at sea.
I’ve switched back to Mallow for this fight, forgetting that I usually have both Mallow and Toadstool since the boss here isn’t actually a pushover, even when over leveled. Instead, I have Bowser and Mallow joining Mario, which will make things a bit more complicated. The fake elder and townspeople are huddled around an overlook by the sea, saying that their ride is late. Seeing Mario, they determine they’ll have to swim for it, but Johnny pops out of the water with his crew, blocking their exit. Seeing that they’ll have to fight their way out, the fakes swarm together and reveal their true form: Yaridovich.
I have to give Squaresoft credit, Yaridovich is actually a pretty intimidating true form. He’s based roughly on a spear, with a long, menacing metal form. The backdrop for the fight is also pretty stunning, taking place on a coastal cliffside at sunset. Everything about this character’s design and this fight’s setting, including the excellent buildup, is so well executed.
The fight itself is no joke. Yaridovich has some beastly special moves of his own, including Water Blast, an attack that hits everyone in the party for over half health. This is where I may have made an error with Mallow and Bowser as I wanted Mallow for his Thunderbolt and Shocker Special Attacks, but Toadstool is really necessary for keeping everyone at full health. Instead of laying a constant magical pounding, Mallow is relegated to healer, slowing using HP Rain on each party member as their status becomes critical. Bowser even has to step in and give Mallow a Mid Mushroom at one point in the fight just to keep him alive.
Yaridovich’s other signature technique is his ability to split into two identical copies, with the mirage form being weaker overall but having access to the attack Meteor Blast, which is more or less as strong as Water Blast, if not more so. Still, Mallow manages to pop off a Thunderbolt attack, letting me see which Yaridovich takes less damage, revealing the true enemy and allowing my team to wallop him but good.
Smithy’s lieutenant defeated, Mario reclaims the fifth star and a little bit of narration points out that Smithy is now officially making a bid for the stars, which adds a new layer to all of this. Once again, the story isn’t as simple as just “evil guy came to rule the world with the seven stars.” Rather, Smithy is a villain who just loves waging war, and upon entering Mario’s realm he accidentally sent the seven stars scattering. Now that he’s learned exactly what they do, he wants them, lining up both of your main goals into one: stop Smithy from getting the seven stars.
Johnny has dove back into the sea, but not before leaving a note to let us know we’re still shipmates ‘til the end. I wish Johnny came in later for one more triumphant assist, but there are bigger fish to fry. Namely, all of Seaside’s shops are open again! WOO! Time to spend all these coins! I grab some new weapons for Toadstool, Mallow, and Geno, and then it’s time to head out in search of the sixth star.
This next section is admittedly actually really beefy, with from what I can see, probably four major parts coming up, if not more. There’s a lot in store, so next time, we set off for Land’s End!
Current Feelings: