
By Chris Pranger
Session 5: Gobi’s Valley
In this session, I make a huge mistake. Turns out the game really did want me to go to Freezeezy Peak next, but I’m stubborn and refuse to give in to pressure, so I’ve skipped right along to Gobi’s Valley, thinking the sprinting shoes were the most important move to learn. Nah. I mean, yes, they’re important, but they’re not the ONLY important move I’ve yet to learn. The lesson here is that Rare was flying by the seat of their pants with Banjo-Kazooie, and it’s magical that it all came together as well as it did.
Starting off, Gruntilda’s lair is finally starting feel substantially big. The comparisons to Super Mario 64 will never stop, so placing Peach’s Castle next to Gruntilda’s lair shows two very different hub worlds. Peach’s Castle is more or less contained with some exploration here and there but for the most part you have the first floor, the basement, and the upper floors.
Gruntilda’s lair, in contrast, is a series of large rooms connected in increasingly confusing ways. The more worlds you unlock, the further into her lair you’ll have to traverse to continue on. Granted, the idea is that you’ll be playing in extended sessions, meaning the worlds will start to blend together a bit and you’ll leave and come back as you explore more and more. For me, since I’m exiting the game after each session, I have to trek back through everything to the next world. This is made a bit easier with the help of magic teleportation cauldrons, but for now I’m just hoofing it (or not since, as mentioned last time, I cannot turn into a horse).
Gobi’s Valley is now the third world out of five we’ve visited that’s name comes from a character in it. Mumbo’s Mountain is presumably a mountain that Mumbo owns or rules or is associated with in some way (despite having houses in multiple worlds). Clanker’s Cavern is, as you’d guess, a cavern for Clanker, which especially fits since he’s the largest single setpiece of the game so far.
Gobi’s Valley, however, is a bit stranger of a name. It holds relevance to Banjo and Kazooie since we’ll encounter the titular Gobi the camel a few times here, but he’s actually a very minor character whereas the visage of a pharaoh named Jinxy is plastered everywhere, even used to access locations associated with other pharaohs.
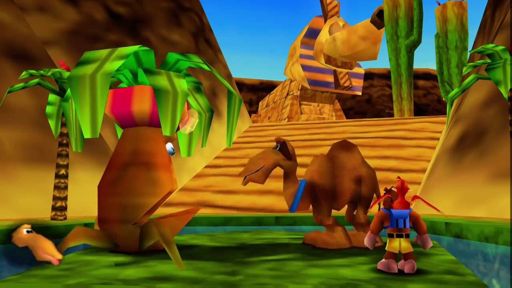
The first thing we see upon entering the world, beyond a river of sand, is a dumpy looking tree in the middle of a tiny oasis. This is Trunker, and he’s thirsty, a cruel irony since he’s surrounded by the only clean blue water in the world.
After trotting up the sandy hill we see the bigger area. Gobi’s Valley begins in a small area with a pathway that leads into a larger area full of setpieces, including a sphinx, multiple pyramids, and a whole lot of sand, which comes in two varieties. The first type of sand is just ground texture, totally harmless. The second type of sand looks like liquid with strange whorls in it. This sand is essentially just the piranha-infested waters again, except this time it’s filled with sand eels because sure.
Since the sphinx is the first big thing to explore, we climb its back and check things out. A pair of cacti with platforms stand before it, giving you a vantage point to talk to the sphinx. He tells us his name is Jinxy and that his nose is stuffed up. Firing an egg into each nostril makes him sneeze and clear out his sinuses, rewarding us for our trouble by opening a door to get inside. Helping large things and then going inside of them is a very common theme here.
Inside Jinxy is a platforming challenge involving magic carpets and Jinxy statues. Firing eggs into their mouths make the carpets raise up, letting you jump higher and higher until you reach the Jiggy at the highest point.
Right outside Jinxy is another magic carpet making the rounds over some of the danger sand. It only really goes between two spots, those being next to Jinxy and then to the entrance to a tomb in the side of the cliff. I ride the carpet and enter the tomb since the door’s open, something that wouldn’t have been true had I not had some Nuts & Bolts save data on the system since the tomb contains the second Stop ‘n’ Swap egg. I still don’t know what use these eggs will have, but it feels good getting things nonetheless.
On top of Jinxy is a flight pad, meaning I’ll get a chance to fly around a little here in the open area, and also that I’ve seen where I’ve made an error. Gobi’s Valley has one new move, which is simply just access to the running shoes. Freezeezy Peak has only one move as well, the Beak Bomb, a move that has Kazooie shoot the pair forward super fast while flying, essentially making it an aerial attack for hitting switches and the like.
Flying around shows me a pyramid with a big Kazooie target on it, something I can’t hit as I don’t have the Beak Bomb technique yet. Therefore, one of the pyramids will remain inaccessible for now while I pull my hair out at the very thought of not completing everything on the first try.
Still, flying around proves necessary as a golden Jinxy statue has a hoop above it, letting the player connect the dots and understand they need to fly through it. Once you fly through the hoop, a new golden Jinxy statue rises up somewhere else in the area, acting pretty much just like the golden Croctuses from Bubblegloop Swamp. After flying through five I’m rewarded with a Jiggy on Jinxy’s back.
Finally, it’s time to talk to Bottles and get permission to use the running shoes, another one of my favorite power-ups since they’re simply a limited speed boost to the Talon Trot. Anything that lets me run faster is a welcome addition, and it feels good to run so fast that we can grab the Jiggy out of a sand mummy’s hand.
Meanwhile, a smaller pyramid off to the side has a button that makes a honeycomb chamber appear in the middle of a hexagon-shaped cactus with eyes and spines that look like teeth. It’s a nice Lovecraftian horror and a simple task of flying through without touching the edges to get the honeycomb chamber.
Heading into that little pyramid presents a simple matching game challenge. Banjo’s and Kazooie’s faces are on a floor broken into a 4x4 grid where stomping on one of the sections flips it over to show an image of something that needs to be matched. Find the match each of the eight times and you get a Jiggy. Simple, right? It’s made slightly more complicated with a 100-second timer, and also a mummy that runs around trying to injure you, though the mummy can be instantly killed with the Wonderwing, so that threat is sort of a non-issue.
Here’s where we come to Gobi himself. A lone camel is tied to a rock out in the middle of some sand eel sand, pining for some shade. A simple stomp on the rock frees him to take off for said shade, leaving behind a Jiggy for our trouble. We’ll see Gobi again before this is all said and done, but for now there’s another pyramid to explore.
One of the pyramids has a pathway up to the top that doglegs back and forth. The entrance on the top is closed unless you hit a switch at the base, prompting a timer to start. Talon Trotting isn’t enough to reach it in time, meaning you’ll need to have the running shoes on when you press the switch. However, one incredibly annoying aspect of this timer is that when the timer begins, you have to watch a cutscene showing the door opening while the timer continues to run, burning at least five seconds off your allotted time. Because of how tight the timing is on this, it takes me two attempts to get inside the pyramid.
Once in, I discover that the pyramid is flooded. A goofy face made out of stones is on the floor at the bottom with a Jiggy sitting on the nose. A few more mummies are stumbling around in the water, waiting for me to grab the Jiggy. Doing so opens the door at the bottom, draining the water out and into the central area of the world to act as a moat around an empty platform.
Previously, this central platform was surrounded by a deep pit with the bad sort of sand at the bottom, but now that it’s been flooded, it’s safe to swim through and collect a few stray music notes. It also makes it simpler to stand on the raised pillars in the moat and shoot eggs into moving Jinxy statues. Again, this is, what, the third grouping of Jinxy statues, besides Jinxy himself? Feels like this should have been Jinxy’s Valley.
Feeding all three of the statues raises a new pyramid from the center platform, which contains the tomb of King Sandybutt, leading to further questions. Was King Sandybutt more important than Jinxy? Why were Jinxy’s statues guarding this tomb? Is King Sandybutt really even dead considering he’s mentioned in the sequel as being alive? Who can say, but his tomb is a maze with a 60-second timer before...I assume death. I’m not sure, I Talon Trotted fast enough to explore the whole thing without getting caught outside the time limit.
Since I don’t yet have the Beak Bomb and can’t access the final pyramid, I resign myself to my fate and head toward the exit, showing that Gobi is hanging out in front of Trunker. He mentions that the tree looks super thirsty, but says he needs all of his water, despite again being surrounded by fresh water. A little stomp on Gobi’s back sprays the needed water into Trunker, saving the tree and sending Gobi galloping off in a huff.
Gobi doesn’t gallop overly far though since he’s quickly found by that tomb entrance in the cliff. Another stomp makes him spit out the world’s second honeycomb chamber as he say he’s leaving the valley entirely, thus yet again bringing into question whether it should be named Gobi’s Valley at all. I say let Jinxy have it.
I just can’t leave well-enough alone though, so after exiting the world I dash over to Freezeezy Peak to learn the last move, which I manage to do pretty quickly. I also make a point of not grabbing anything from Freezeezy Peak since I’ll do that fully next session.
With the final move of the game in my toolkit, I rush back into Gobi’s Valley to get into that last pyramid, which contains the world’s final eight music notes and last Jiggy, acquired by offering a few eggs to a snake named Histup that stretches out from his basket into the air with the help of his master Rubee’s flute playing. Total time in Gobi’s Valley: 37 minutes.
Normally, this task would have taken me far longer, but the version of Banjo-Kazooie in Rare Replay has some huge quality of life improvements, forefront among them the ability to save all progress within a world rather than resetting certain collectables. In the N64 version, exiting a stage would have given you a “high score” for music notes, meaning that a stage exit or death meant resetting all progress toward 100 notes. And yes, I did have times as a kid where I was about to grab the last music note in a world and stumbled to my death instead, making me do it all over again. Had I been playing the N64 version, exiting to go get the Beak Bomb would have required me to trek all throughout Gobi’s Valley a second time to collect every music note. Thank you, Rare Replay!
And with that, I’ve found another 10 Jiggies, 100 music notes, five Jinjos, and two honeycomb chambers. Next time Christmas comes to Banjo-Kazooie with Freezeezy Peak!