
Session 7: The Hateno Ancient Tech Lab
Hey there, glad you could make it! This is Riding the Backlog, where I ride my exercise bike as I play a video game. For this series, I’m riding while playing Breath of the Wild, a Zelda game that had me grousing something fierce just a few years ago. This time, however, things feel a lot better. Enough lead-up, let’s get into things!
Today’s amiibo haul is fairly uneventful without any new pieces of clothing, but Zelda does provide a Knight’s bow with a base power of 32 and a +6 damage boost (not sure if that means it’s got a power of 38 or if without the damage boost it’d have a power of 26). Toon Link also offers a Sea Breeze boomerang, which looks very close to the boomerang you have in The Wind Waker. That’s going to make it very hard to actually want to use it since if it’s that special, I certainly don’t want to risk breaking it.
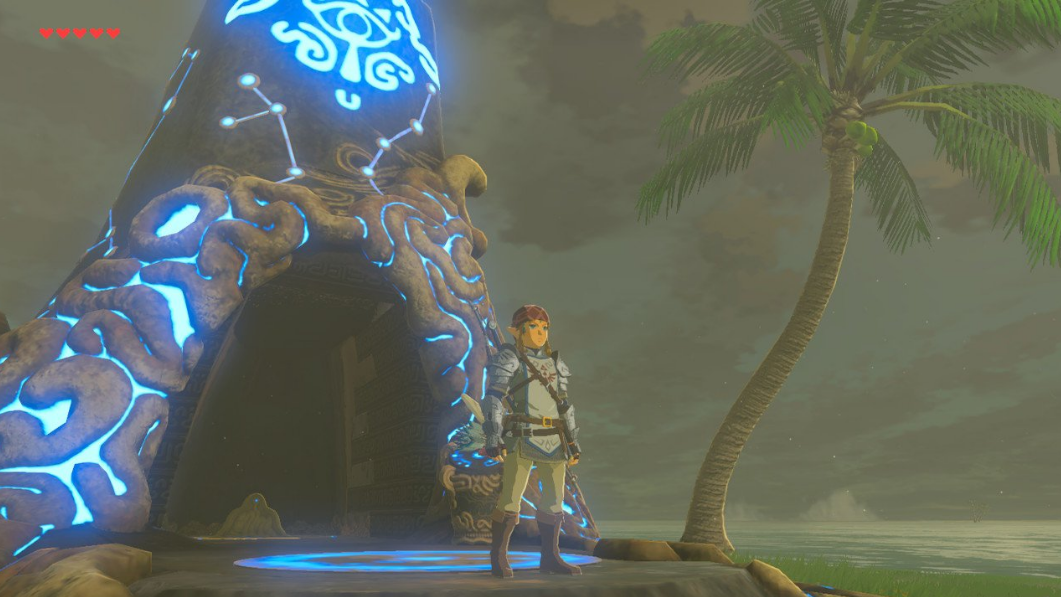
No more stalling though, it’s time to go into the Hateno Ancient Tech Lab and find out who this girl is that the kids around town have been commenting about. Upon entering I find a little girl named Purah who points me to the director in the back. I move on and speak to a man named Symin who tells me that he isn’t the director, Purah is. And that she’s not a kid at all.
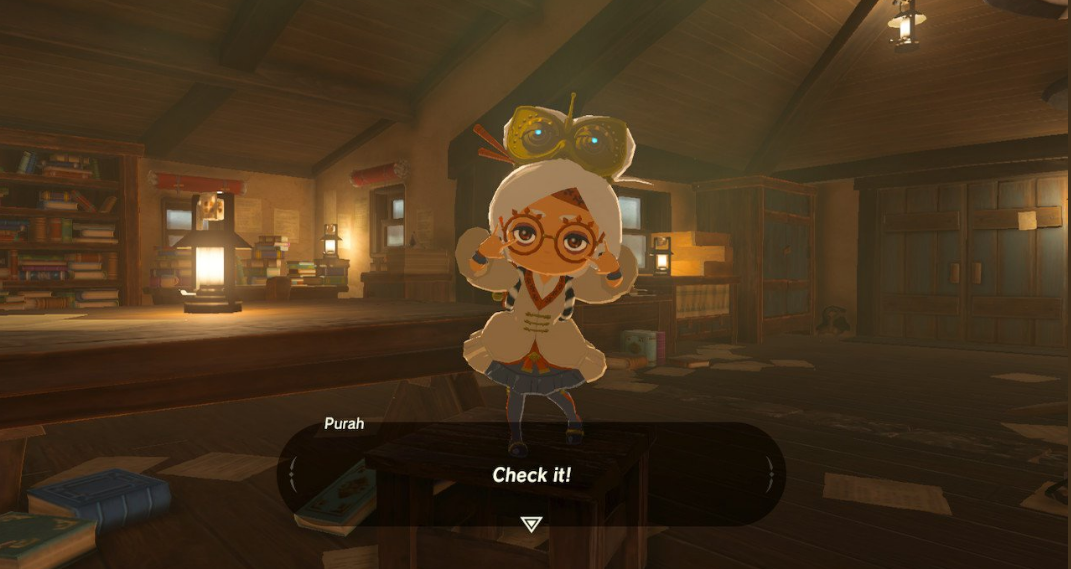
Purah is a very weird character and one that stood out to me way too much my first playthrough as someone who doesn’t really fit with the rest of the game’s aesthetic. I know, it’s hard to say something like that in a series as dynamic and out there as Zelda, but Purah is a character who routinely breaks the mood by doing Japanese idol-style poses with added sound effects to emphasize her modernness. Not that there isn’t a presidence set for this with Lana in Hyrule Warriors, but there the game was made by Koei-Tecmo and the emphasis wasn’t placed as heavily on maintaining the sacredness of the series, instead doing something bonkers. Here the bonkers inclusion of Purah feels instantly foreign.
Despite the discomfort with the character, Purah has grown on me a bit. She’s classic Zelda series in her design, being an elderly scientist who happened to succeed in an experiment and become extremely young. She’s perhaps the smartest character in the game, and is also the most immature. She is a perfect example of inverting expectations, which the series does quite regularly.
Her role is to piggyback off the concept that Impa introduced of regaining everything that Link had lost, specifically his memory. Purah reveals herself to be the one who placed him in the rejuvenation chamber 100 year ago, and then investigates his Sheikah Slate, determining that it is still missing features. Before she can unlock them though, I need to light the furnace connected to the research lab, which involves transporting the blue fire from a nearby blue furnace all the way from the town to the top of the hill where the lab sits.
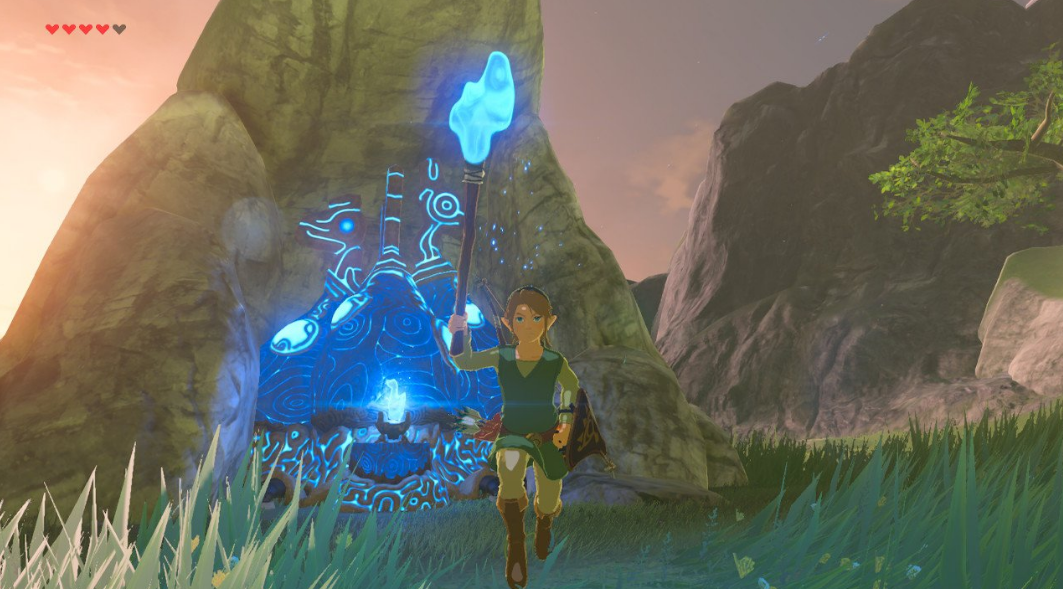
At least this task is pretty straightforward. If you look out over the village from your vantage point in front of the lab, you can see a blue something or other glowing. I took a running start and leapt off the side of the hill, gliding directly to the correct location, find that it is, indeed, a sort of furnace with a blue flame just sitting out here conveniently near a place that can make use of it.
Transporting the flame is rather simple. You just need a torch, or some arrows in a pinch. The torch method is simplest since that’s what the torch is for. You equip your torch weapon, swipe it through the flames, and badda-bing badda-boom, you got yourself a blue torch. Cue Chariots of Fire.
Along the path on the outskirts of town are some terracotta lanterns that you can light using the blue flame. Lighting them does nothing other than making them forever lit with that nice blue light. I really like the way they look, especially in the dark. Lighting more and more create a path both into town, then through town, as well as back up the hill to the research lab. Even though it does nothing, I feel like getting this town lit.
The big downside to torches is that you cannot run or climb, lest you should lose your lit torch. Running makes you put your weapon away, causing Link to snuff the torch in the process. Same for climbing or talking to someone. It means that carrying this flame through town is done at a gentle trot rather than a full sprint. Thankfully, once a lantern has been lit, I can relight my torch from that, giving them their true purpose as blue flame checkpoints.
While exploring the village a little just to make sure I didn’t miss any lanterns, I come across one of Bolson’s carpenter crew, a man named Hudson. The dialogue back and forth with him is sweet, setting him up as a big loveable lug who does good work and likes what he does. He’s soft-spoken and simple, and at one point he asks if I’d like to join Bolson’s team before realizing that Link’s name does not end in “son,” an apparent requirement for the job. This will weirdly become important later on.
In the middle of town are some cooking dishes that are open for anyone to use, assuming they can light the wood bundle underneath them. I do so with my blue torch and go about cooking some new dishes, focusing on stamina-replenishing foods just in case I make another attempt at taming a deer.
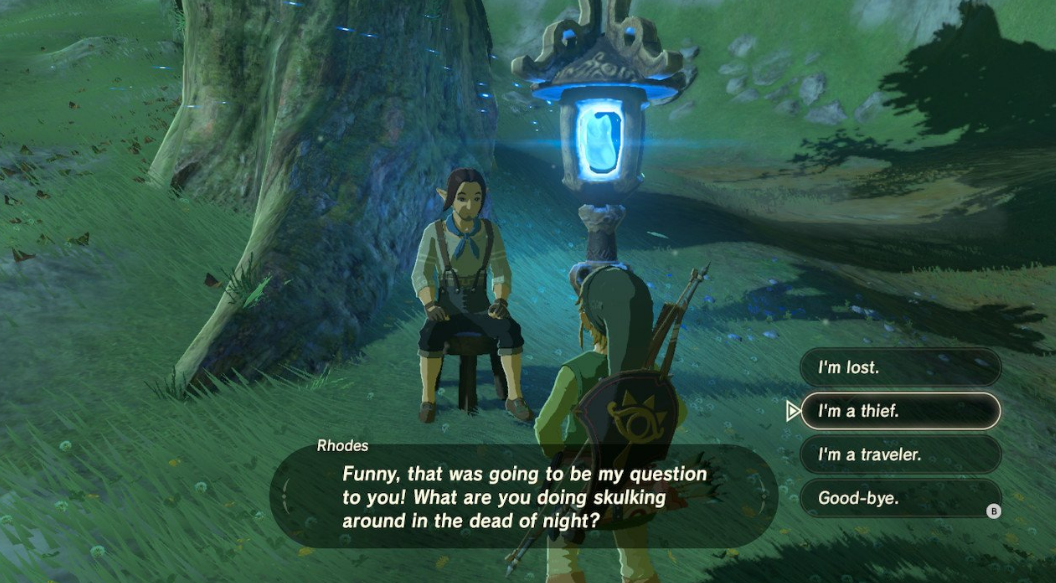
Along my way up the hill, I talk with a man sitting next to one of the blue flame lanterns. We have a short, pleasant conversation until he asks me why I’m out at night. I tell him the truth, that I’m a thief, but his just laughs this off and goes back to sitting. I don’t know what’s so funny, I’m a degenerate and if he had something worth taking, I would have taken it by now.
I trudge up the hill, lighting more lanterns along the way, leaving just the furnace at the research lab left. Literally a few steps away from it the most obnoxious feature of Breath of the Wild kicks in: it starts to rain.
Rain is frustrating. Sure, visually and tonally it’s a worthy inclusion, but functionally it exists only to create annoyance and force you to sit and do nothing. Thing is, rain is wet, which means that torches get snuffed immediately and can’t be relit until the rain clears up. Same goes for arrows or lighting any fires whatsoever. Furthermore, all surfaces become slick, so attempting to climb while it’s raining is extremely difficult and almost not worth it.
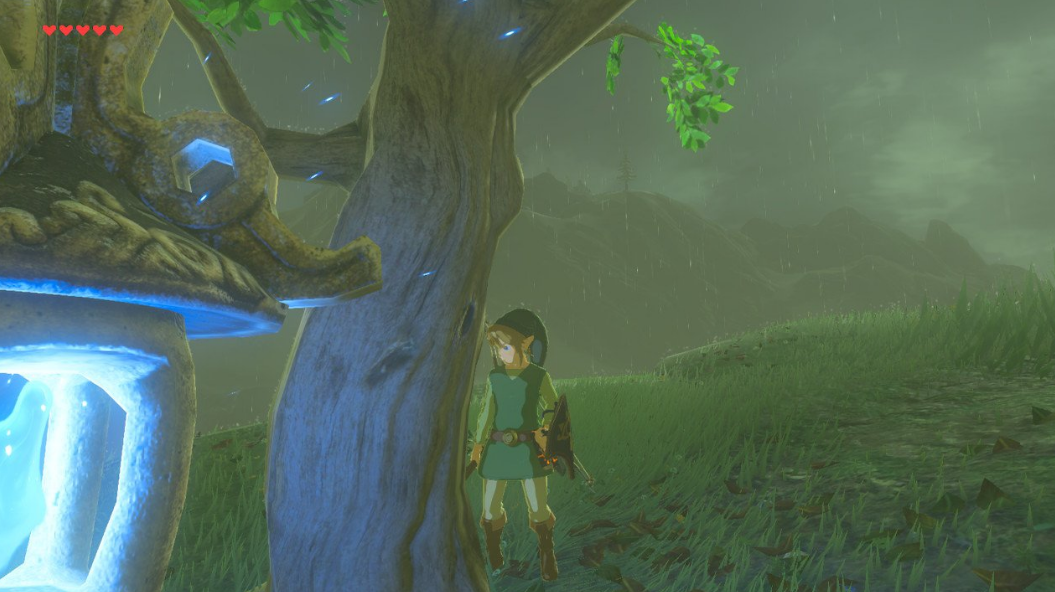
The solution to rain is to wait it out, which usually means just standing around doing nothing at all. I swiped at the blue lantern in vain, trying to magically light the torch and finish my simple quest, but nothing. I ran around in circles, climbed the tree next to the lantern, and generally became an impatient child while waiting. I even take some time to just stare at the tree. Not even having that little of patience, I ran off to a nearby apple orchard and chucked my remote bombs at the trees, felling each and turning them into bundles of wood.
At last the rain stops and I can go light that furnace, giving Purah the ability to completely repair my Sheikah slate. According to her, it’s missing a pretty significant feature, and she’s right. Her little data distiller unlocks the camera rune, one of the most-used runes of the game, as well as the photo album and the Hyrule Compendium, also known as the list of collectibles.
I’ve got a lot to unpack here, so strap in! First, this is exactly why I said it’s clear the game wants you to come this way first and that by exploring first you’ll miss mission-critical elements. There are certain side quests that ask Link to show someone a picture of something, but you can’t do that if your Sheikah Slate can’t take pictures. Without the camera and Hyrule Compendium unlocked, you also miss out one a significant portion of the game’s completion features.
With the Hyrule Compendium, every weapon, shield, bow, enemy, animal, and plant has an entry. The only way to complete these entries is by snapping a photo of each one, correctly lining up your shot to include the subject in the frame. Easy when you’re taking a picture of a spear on the ground. A bit harder when it’s an Electric Keese franticly fluttering about.
You’ll really want to get these pictures though since items in the Hyrule Compendium can be pinged using your Sheikah Sensor, making it easier to find them. Extremely useful when you need to farm for specific materials, but frustrating that the game doesn’t immediately add items you’ve already picked up. It must be done via a picture, no matter how tedious. It doesn’t care if you don’t remember which basic items you’ve already picked up and ignored, you have to go find them and scan them into the compendium one at a time.
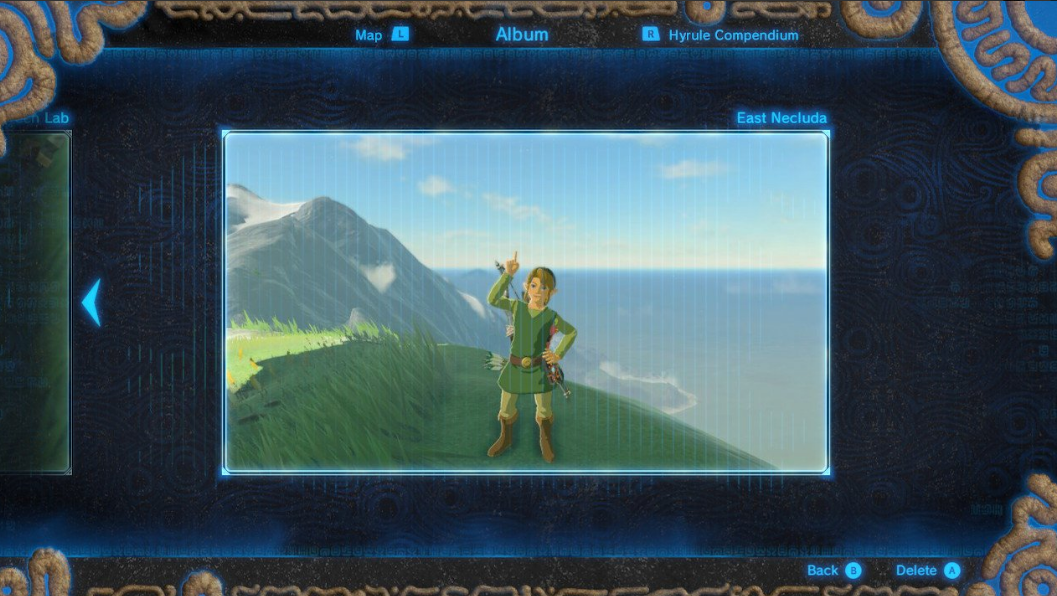
Some of this is accomplished via selfies with the camera. Yes, Link can take selfies and even pose. This feature should be great and yet it sort of sucks. The Switch already HAS a built in screenshot feature, so the necessity of a mode that lets you take pictures doesn’t exist. The only added benefit of the camera selfie mode is that Link’s poses can be hilarious in the right circumstances. But to make the problem worse, you can only take pictures in these poses when you’re using the rune itself, so all pictures you take have the weird blue wavy texture to them and get shrunk to fit in the Sheikah Slate border aesthetic. As you can see, this makes screenshots them look less impressive than they’d otherwise be.

Perhaps the coolest thing unlocked with the camera rune is an album of 12 landscape pictures, previously taken by Zelda herself when the Sheikah Slate belonged to her. These images show spots around Hyrule that I need to find, though exactly why isn’t made clear yet. To learn that I’ll have to go meet up with Impa again, setting my next main quest destination back in Kakariko.
That felt like a lot was suddenly unlocked, but there’s more yet to flesh out my slate. Purah can upgrade my sensor, bombs, and stasis rune, but it’ll cost me. Not a lot, just three ancient items for each. Ancient loot is plucked from defunct Guardians, so ancient screws, shafts, gears, and springs are pretty easy to come by. I upgrade my sensor to be able to track things, and my bombs to be stronger. The stasis upgrade will have to wait though as that requires three ancient cores, which are apparently far rarer.
Enough with this research lab, time to adventure again! One of the villagers mentioned issues with monsters coming up from Hateno Beach and spooking or stealing her sheep, so that feels like a good place to go next. I haven’t had a good fight in a while and I’m itching to test out some of my sharper weapons.
Instead of heading up the hill to the lab, I take the path that leads steeply down toward an open ocean below. The more I decent, the more I can see. The land starts to become wild again rather than the peaceful grassland of the village. A new little pool of water with its own waterfall greets me, containing another Korok lily ring that requires a jump from up high to land in the center.
Before reaching the beach, a new enemy variation pops out of the ground: Stalizalfos. These are entirely new, being Stalfos versions of Lizalfos. I’m sure you could have guessed. Just like the other Stalfos, busting them apart isn’t enough. I also have to destroy their skeleton head and the skeleton heads of all their party before the bones disappear and I’m rewarded with some spoils, including their arms which can be used as melee weapons.

The beach itself is home to some crabs, as well as a stellar view. A lone shrine glows orange out a ways into the water, which is tempting, but to the left is more clearly the enemy camp the woman from Hateno was concerned about. This would turn out to be one of my roughest fights yet, but I had no way of knowing that I’d be sent into a meat grinder.
Her role is to piggyback off the concept that Impa introduced of regaining everything that Link had lost, specifically his memory. Purah reveals herself to be the one who placed him in the rejuvenation chamber 100 year ago, and then investigates his Sheikah Slate, determining that it is still missing features. Before she can unlock them though, I need to light the furnace connected to the research lab, which involves transporting the blue fire from a nearby blue furnace all the way from the town to the top of the hill where the lab sits.
At least this task is pretty straightforward. If you look out over the village from your vantage point in front of the lab, you can see a blue something or other glowing. I took a running start and leapt off the side of the hill, gliding directly to the correct location, find that it is, indeed, a sort of furnace with a blue flame just sitting out here conveniently near a place that can make use of it.
Transporting the flame is rather simple. You just need a torch, or some arrows in a pinch. The torch method is simplest since that’s what the torch is for. You equip your torch weapon, swipe it through the flames, and badda-bing badda-boom, you got yourself a blue torch. Cue Chariots of Fire.
Along the path on the outskirts of town are some terracotta lanterns that you can light using the blue flame. Lighting them does nothing other than making them forever lit with that nice blue light. I really like the way they look, especially in the dark. Lighting more and more create a path both into town, then through town, as well as back up the hill to the research lab. Even though it does nothing, I feel like getting this town lit.
The big downside to torches is that you cannot run or climb, lest you should lose your lit torch. Running makes you put your weapon away, causing Link to snuff the torch in the process. Same for climbing or talking to someone. It means that carrying this flame through town is done at a gentle trot rather than a full sprint. Thankfully, once a lantern has been lit, I can relight my torch from that, giving them their true purpose as blue flame checkpoints.
While exploring the village a little just to make sure I didn’t miss any lanterns, I come across one of Bolson’s carpenter crew, a man named Hudson. The dialogue back and forth with him is sweet, setting him up as a big loveable lug who does good work and likes what he does. He’s soft-spoken and simple, and at one point he asks if I’d like to join Bolson’s team before realizing that Link’s name does not end in “son,” an apparent requirement for the job. This will weirdly become important later on.
In the middle of town are some cooking dishes that are open for anyone to use, assuming they can light the wood bundle underneath them. I do so with my blue torch and go about cooking some new dishes, focusing on stamina-replenishing foods just in case I make another attempt at taming a deer.
Along my way up the hill, I talk with a man sitting next to one of the blue flame lanterns. We have a short, pleasant conversation until he asks me why I’m out at night. I tell him the truth, that I’m a thief, but his just laughs this off and goes back to sitting. I don’t know what’s so funny, I’m a degenerate and if he had something worth taking, I would have taken it by now.
I trudge up the hill, lighting more lanterns along the way, leaving just the furnace at the research lab left. Literally a few steps away from it the most obnoxious feature of Breath of the Wild kicks in: it starts to rain.
Rain is frustrating. Sure, visually and tonally it’s a worthy inclusion, but functionally it exists only to create annoyance and force you to sit and do nothing. Thing is, rain is wet, which means that torches get snuffed immediately and can’t be relit until the rain clears up. Same goes for arrows or lighting any fires whatsoever. Furthermore, all surfaces become slick, so attempting to climb while it’s raining is extremely difficult and almost not worth it.
The solution to rain is to wait it out, which usually means just standing around doing nothing at all. I swiped at the blue lantern in vain, trying to magically light the torch and finish my simple quest, but nothing. I ran around in circles, climbed the tree next to the lantern, and generally became an impatient child while waiting. I even take some time to just stare at the tree. Not even having that little of patience, I ran off to a nearby apple orchard and chucked my remote bombs at the trees, felling each and turning them into bundles of wood.
At last the rain stops and I can go light that furnace, giving Purah the ability to completely repair my Sheikah slate. According to her, it’s missing a pretty significant feature, and she’s right. Her little data distiller unlocks the camera rune, one of the most-used runes of the game, as well as the photo album and the Hyrule Compendium, also known as the list of collectibles.
I’ve got a lot to unpack here, so strap in! First, this is exactly why I said it’s clear the game wants you to come this way first and that by exploring first you’ll miss mission-critical elements. There are certain side quests that ask Link to show someone a picture of something, but you can’t do that if your Sheikah Slate can’t take pictures. Without the camera and Hyrule Compendium unlocked, you also miss out one a significant portion of the game’s completion features.
With the Hyrule Compendium, every weapon, shield, bow, enemy, animal, and plant has an entry. The only way to complete these entries is by snapping a photo of each one, correctly lining up your shot to include the subject in the frame. Easy when you’re taking a picture of a spear on the ground. A bit harder when it’s an Electric Keese franticly fluttering about.
You’ll really want to get these pictures though since items in the Hyrule Compendium can be pinged using your Sheikah Sensor, making it easier to find them. Extremely useful when you need to farm for specific materials, but frustrating that the game doesn’t immediately add items you’ve already picked up. It must be done via a picture, no matter how tedious. It doesn’t care if you don’t remember which basic items you’ve already picked up and ignored, you have to go find them and scan them into the compendium one at a time.
Some of this is accomplished via selfies with the camera. Yes, Link can take selfies and even pose. This feature should be great and yet it sort of sucks. The Switch already HAS a built in screenshot feature, so the necessity of a mode that lets you take pictures doesn’t exist. The only added benefit of the camera selfie mode is that Link’s poses can be hilarious in the right circumstances. But to make the problem worse, you can only take pictures in these poses when you’re using the rune itself, so all pictures you take have the weird blue wavy texture to them and get shrunk to fit in the Sheikah Slate border aesthetic. As you can see, this makes screenshots them look less impressive than they’d otherwise be.
Perhaps the coolest thing unlocked with the camera rune is an album of 12 landscape pictures, previously taken by Zelda herself when the Sheikah Slate belonged to her. These images show spots around Hyrule that I need to find, though exactly why isn’t made clear yet. To learn that I’ll have to go meet up with Impa again, setting my next main quest destination back in Kakariko.
That felt like a lot was suddenly unlocked, but there’s more yet to flesh out my slate. Purah can upgrade my sensor, bombs, and stasis rune, but it’ll cost me. Not a lot, just three ancient items for each. Ancient loot is plucked from defunct Guardians, so ancient screws, shafts, gears, and springs are pretty easy to come by. I upgrade my sensor to be able to track things, and my bombs to be stronger. The stasis upgrade will have to wait though as that requires three ancient cores, which are apparently far rarer.
Enough with this research lab, time to adventure again! One of the villagers mentioned issues with monsters coming up from Hateno Beach and spooking or stealing her sheep, so that feels like a good place to go next. I haven’t had a good fight in a while and I’m itching to test out some of my sharper weapons.
Instead of heading up the hill to the lab, I take the path that leads steeply down toward an open ocean below. The more I decent, the more I can see. The land starts to become wild again rather than the peaceful grassland of the village. A new little pool of water with its own waterfall greets me, containing another Korok lily ring that requires a jump from up high to land in the center.
Before reaching the beach, a new enemy variation pops out of the ground: Stalizalfos. These are entirely new, being Stalfos versions of Lizalfos. I’m sure you could have guessed. Just like the other Stalfos, busting them apart isn’t enough. I also have to destroy their skeleton head and the skeleton heads of all their party before the bones disappear and I’m rewarded with some spoils, including their arms which can be used as melee weapons.
The beach itself is home to some crabs, as well as a stellar view. A lone shrine glows orange out a ways into the water, which is tempting, but to the left is more clearly the enemy camp the woman from Hateno was concerned about. This would turn out to be one of my roughest fights yet, but I had no way of knowing that I’d be sent into a meat grinder.
If red Moblins were stronger than blue Bokoblins, then seeing a blue Moblin is a sure sign that things are about to get deadly, doubly so when they’re accompanied by black Bokoblins, whose power I can’t even accurately judge yet. My armor isn’t providing the sort of protection I’d hoped for, and my weapons haven’t got the oomph I’d like, but this battle shall not end in my destruction.
It will certainly come close though! A lone Bokoblin, I forget if it was blue or black, had access to a bow many strength levels above what was reasonably fair. This meant that while trying to fight the swarm of powerful enemies right in front of me, I took an arrow to the back that instantly drained all five of my hearts. Thankfully a fairy popped out and set me on the right course again, but another stray arrow put me back to a fourth of a heart of health, forcing a quick apple feast.
I’ll admit, this battle was sloppy. I was swinging madly, just trying to do as much damage to as many enemies as possible. Most of the Bokoblins had spears of some sort, which are useful when fighting a single enemy at a time, but the one-handed and two-handed weapons fair much better with crowd control. Slowly but surely I manage to thin their numbers until I’m the last man standing on that beach. The sheep are saved, my duty is done. I’ll have to remember to speak to the woman back in the village to finish off the quest.
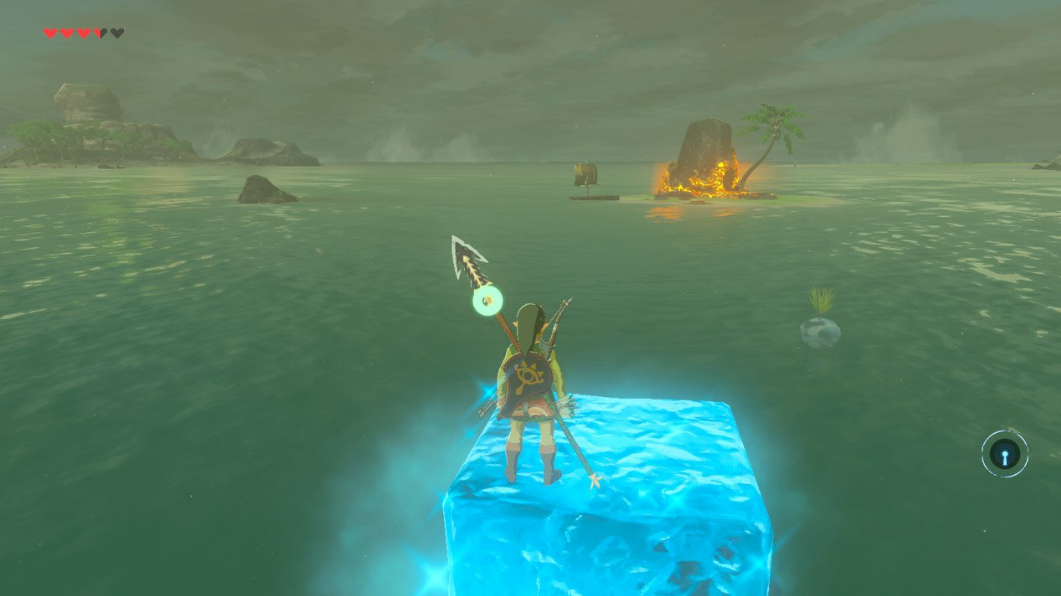
But of course, that island shrine not far from me is far too alluring to ignore. The most likely method for reaching it involves gliding to it from a nearby cliff. However, trekking up there is a journey in of itself. There are no rafts nearby, so my solution is the dumb slow kind. I shall use cryosis one block at a time and slowly walk across.
As stated, this method is extremely slow, requiring me to stand on top of an ice block, create one a short hop away, hop to it, climb to the top, and repeat the process until I’m on the island. Along the way I’m accosted by some blue Lizalfos popping out of the water to spray me with water, which is annoying but not enough to deter me from my task for long.
Eventually I make it to my destination, but instead of immediately entering the shrine I notice a very short stump-like cutout on the ground with a leaf on it. Stepping onto the platform zooms a little light out and with a POP a circle of glowing dots appears a little ways off. As the dots slowly begin to shrink one by one it becomes apparent that I am being timed and must jump through that circle before all the dots have shrunk. This is simple enough and nets me another Korok Seed. At this point I have quite a few, but no means to spend them since Hestu has disappeared.
My attention firmly returned to the shrine, I enter. This is Chaas Qeta shrine, home to a Major Test of Strength. Throughout the game there are a handful of shrines, around 20 if memory serves me well, that are labeled as either a Minor, Modest, or Major Test of Strength. This one being a Major test is alarming for someone so underpowered. I quickly equip my strongest armor and prepare for the challenge.
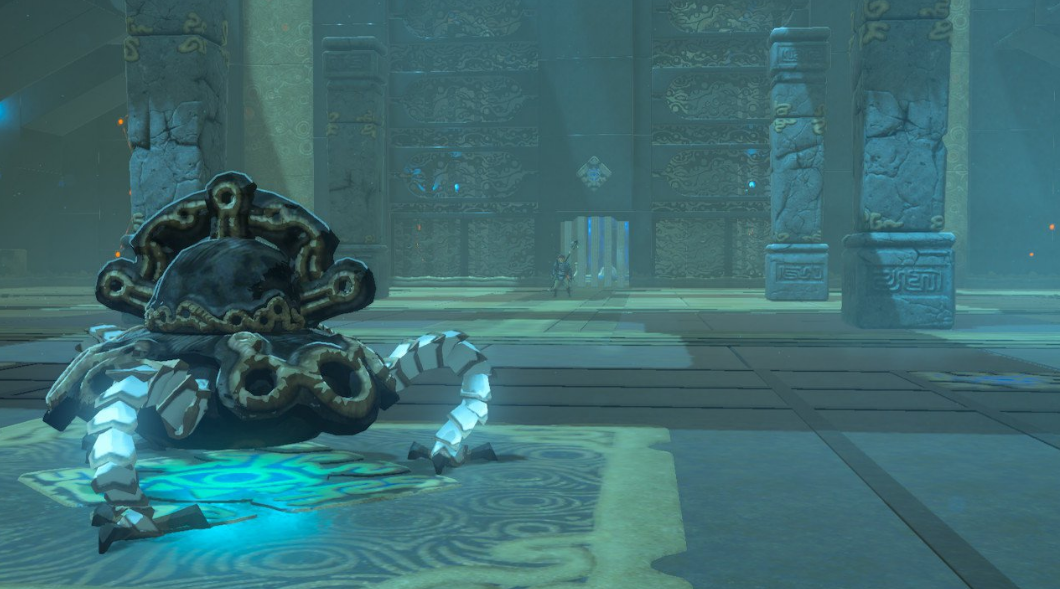
Each of these tests is more or less identical with Link entering an arena. A Guardian-like thing rises out from a platform in the center and brandishes a number of weapons, in this case a spear, a short sword, and a huge axe. In the Minor or Modest tests, the Guardian warrior would only have one or two, but since this is the Major leagues, we’ve got all three to contend with.
As the thing runs over to me, I pull out my own glowing blue short sword. Glowing blue weapons, classified as “ancient weapons,” tend to do more damage to Guardian enemies, so I figured my little blue sword with 20 strength would suffice. I was quite wrong.
The trick to the bulk of these fights is to lock on to the enemy and wait for it to attack, then dodge at the right time to trigger a flurry attack. Each of the weapons has slightly different tells and timing for when to dodge. For instance, the short sword will be pulled out in front, and then chopped quickly in a vertical slice, while the axe will be brought to the side, given adequate wind up, then chopped horizontally.
Despite my best efforts, my weapons are outclassed pretty severely, even when using the weapons from my Ganondorf amiibo drops. After a few successful hits, the Guardian fighter leaps back and then spins its arms rapidly before shooting straight at me. The trick to this is to stand behind a pillar, causing it to slam into the pillar and stun itself. A few rounds of dodging and hiding whittles my enemy’s health down pixel by agonizing pixel.

But then it switches things up. After enough damage, it pulls its tentacle feet in and sits on the ground, suddenly popping its head up and shooting a beam in a circle as it spins around. You’ll want to be outside this circle, otherwise you’ll take a laser blast to the face. This laser barrage does have the added effect of causing an updraft, so I can float into the air and then start shooting the robot in the eye as long as my stamina holds out.
At last it reaches its final phase where it does away with all niceties and points a laser target right at me while beeping. If I’m caught still targeted when the beeping stops, that’s one explosive bit of damage, let me tell you. Even running is risky because the blasts happen so quickly and so rapidly once they’re charged that unless you’ve given yourself enough distance and have enough stamina, you’re taking at least one shot.
Overall I ended up using all of my best weapons in this Major Test of Strength, coming down to the wire while holding a pretty standard soldier’s sword. I was also out of fairies, so no healing from stray lasers. But still, we persevere and attack head-on in an attempt to shift the fight in my favor, a tactic that has already proven deadly if botched. These stupid mechs just have too much health, and I’m too underdeveloped with armor, health, stamina, and weaponry.
Nonetheless, I manage to pull off an emergency victory at the last second, dismantling my attacker and freeing myself from the Rage Cage. As a reward, not only do I get an ancient core (just two more for upgraded stasis), I get to pick up the Guardian warrior’s three ancient glowing blue weapons. They will surely come in very handy for the next Test of Strength. Even better, this shrine’s final treasure chest contains the Climbing Gear shirt, adding to my climbing speed when worn.
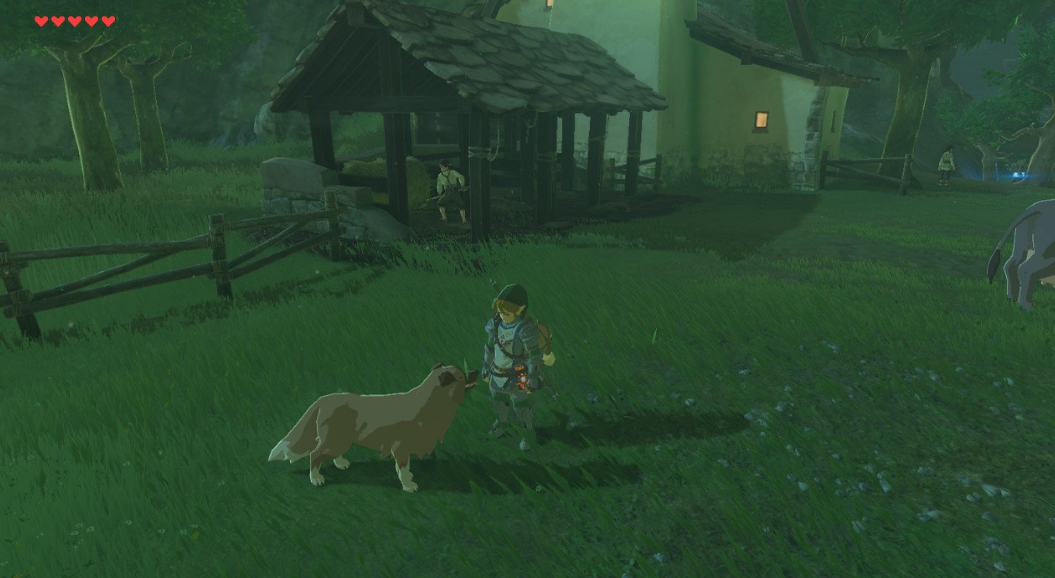
I exit the shrine feeling stronger than ever, but also with far fewer weapons, shields, and healing items. Clearly I have a long way to go before I’m a true monster. To aid in this I make a trip to the Great Fairy and get my full soldier armor beefed up to provide +7 points of defense each. I then warp back to Hateno to dye the armor and give it green highlights, helping it match my classic green hat. This also gives me a chance to tell the farm girl the beach is clear before befriending her dog, apparently.
The Major Test of Strength is a real problem though and speaks to a large misstep in development. I once again feel that there was a severe mistake in not making the shrines scale appropriately like the rest of the game. It doesn’t feel good to find a shrine and discover that unless I had a few overpowered amiibo weapons and thankfully enough healing items, I’d have been unable to succeed. This isn’t a critique of a player’s skill, this is a critique of the weapon durability and power being too low to actually finish this fight unless you specifically broke the natural progression with amiibo.
This issue is further accentuated by the path the player would naturally take as the game is directing them. I could understand encountering a Major Test of Strength far to the northwest or something as that takes you in the polar opposite direction than the game is directing you, but the main questline sends you east to Kakariko, then further east to Hateno, and while in Hateno you would easily be given one of your first real combat-based sidequests that send you just south of Hateno to Hateno Beach where you’d see this island shrine sitting out there for you to reach. If the ONLY way to reach the shrine was jumping from that tall cliff, which itself most likely has a Test of Strength shrine, then I could understand the game’s thought process of giving you a smaller test before demonstrating that there are bigger tests, but with the player having been taught that the cryosis rune can be used to traverse bodies of water, albeit slowly, then you have to assume a low level player is going to try visiting this shrine and get wrecked.
The weird knock-on effect is that I’ve now completed the hardest challenge the game can throw at me. There are no Majorer or Majorest tests to encounter, only simpler ones or similar Major tests. The only challenges from here on out will be challenges of patience as I seek out specific materials for quests and upgrades, though I can think of one challenge nearby that could pose the greatest threat of all.
That will have to wait until next time though! I’ve warped back to Kakariko to speak with Impa in accordance with the game’s main questline, but once that’s done I intend to head back to the southern part of the map and make my way out to an island even further in the distance. See you in session 8 for the next great struggle!
It will certainly come close though! A lone Bokoblin, I forget if it was blue or black, had access to a bow many strength levels above what was reasonably fair. This meant that while trying to fight the swarm of powerful enemies right in front of me, I took an arrow to the back that instantly drained all five of my hearts. Thankfully a fairy popped out and set me on the right course again, but another stray arrow put me back to a fourth of a heart of health, forcing a quick apple feast.
I’ll admit, this battle was sloppy. I was swinging madly, just trying to do as much damage to as many enemies as possible. Most of the Bokoblins had spears of some sort, which are useful when fighting a single enemy at a time, but the one-handed and two-handed weapons fair much better with crowd control. Slowly but surely I manage to thin their numbers until I’m the last man standing on that beach. The sheep are saved, my duty is done. I’ll have to remember to speak to the woman back in the village to finish off the quest.
But of course, that island shrine not far from me is far too alluring to ignore. The most likely method for reaching it involves gliding to it from a nearby cliff. However, trekking up there is a journey in of itself. There are no rafts nearby, so my solution is the dumb slow kind. I shall use cryosis one block at a time and slowly walk across.
As stated, this method is extremely slow, requiring me to stand on top of an ice block, create one a short hop away, hop to it, climb to the top, and repeat the process until I’m on the island. Along the way I’m accosted by some blue Lizalfos popping out of the water to spray me with water, which is annoying but not enough to deter me from my task for long.
Eventually I make it to my destination, but instead of immediately entering the shrine I notice a very short stump-like cutout on the ground with a leaf on it. Stepping onto the platform zooms a little light out and with a POP a circle of glowing dots appears a little ways off. As the dots slowly begin to shrink one by one it becomes apparent that I am being timed and must jump through that circle before all the dots have shrunk. This is simple enough and nets me another Korok Seed. At this point I have quite a few, but no means to spend them since Hestu has disappeared.
My attention firmly returned to the shrine, I enter. This is Chaas Qeta shrine, home to a Major Test of Strength. Throughout the game there are a handful of shrines, around 20 if memory serves me well, that are labeled as either a Minor, Modest, or Major Test of Strength. This one being a Major test is alarming for someone so underpowered. I quickly equip my strongest armor and prepare for the challenge.
Each of these tests is more or less identical with Link entering an arena. A Guardian-like thing rises out from a platform in the center and brandishes a number of weapons, in this case a spear, a short sword, and a huge axe. In the Minor or Modest tests, the Guardian warrior would only have one or two, but since this is the Major leagues, we’ve got all three to contend with.
As the thing runs over to me, I pull out my own glowing blue short sword. Glowing blue weapons, classified as “ancient weapons,” tend to do more damage to Guardian enemies, so I figured my little blue sword with 20 strength would suffice. I was quite wrong.
The trick to the bulk of these fights is to lock on to the enemy and wait for it to attack, then dodge at the right time to trigger a flurry attack. Each of the weapons has slightly different tells and timing for when to dodge. For instance, the short sword will be pulled out in front, and then chopped quickly in a vertical slice, while the axe will be brought to the side, given adequate wind up, then chopped horizontally.
Despite my best efforts, my weapons are outclassed pretty severely, even when using the weapons from my Ganondorf amiibo drops. After a few successful hits, the Guardian fighter leaps back and then spins its arms rapidly before shooting straight at me. The trick to this is to stand behind a pillar, causing it to slam into the pillar and stun itself. A few rounds of dodging and hiding whittles my enemy’s health down pixel by agonizing pixel.
But then it switches things up. After enough damage, it pulls its tentacle feet in and sits on the ground, suddenly popping its head up and shooting a beam in a circle as it spins around. You’ll want to be outside this circle, otherwise you’ll take a laser blast to the face. This laser barrage does have the added effect of causing an updraft, so I can float into the air and then start shooting the robot in the eye as long as my stamina holds out.
At last it reaches its final phase where it does away with all niceties and points a laser target right at me while beeping. If I’m caught still targeted when the beeping stops, that’s one explosive bit of damage, let me tell you. Even running is risky because the blasts happen so quickly and so rapidly once they’re charged that unless you’ve given yourself enough distance and have enough stamina, you’re taking at least one shot.
Overall I ended up using all of my best weapons in this Major Test of Strength, coming down to the wire while holding a pretty standard soldier’s sword. I was also out of fairies, so no healing from stray lasers. But still, we persevere and attack head-on in an attempt to shift the fight in my favor, a tactic that has already proven deadly if botched. These stupid mechs just have too much health, and I’m too underdeveloped with armor, health, stamina, and weaponry.
Nonetheless, I manage to pull off an emergency victory at the last second, dismantling my attacker and freeing myself from the Rage Cage. As a reward, not only do I get an ancient core (just two more for upgraded stasis), I get to pick up the Guardian warrior’s three ancient glowing blue weapons. They will surely come in very handy for the next Test of Strength. Even better, this shrine’s final treasure chest contains the Climbing Gear shirt, adding to my climbing speed when worn.
I exit the shrine feeling stronger than ever, but also with far fewer weapons, shields, and healing items. Clearly I have a long way to go before I’m a true monster. To aid in this I make a trip to the Great Fairy and get my full soldier armor beefed up to provide +7 points of defense each. I then warp back to Hateno to dye the armor and give it green highlights, helping it match my classic green hat. This also gives me a chance to tell the farm girl the beach is clear before befriending her dog, apparently.
The Major Test of Strength is a real problem though and speaks to a large misstep in development. I once again feel that there was a severe mistake in not making the shrines scale appropriately like the rest of the game. It doesn’t feel good to find a shrine and discover that unless I had a few overpowered amiibo weapons and thankfully enough healing items, I’d have been unable to succeed. This isn’t a critique of a player’s skill, this is a critique of the weapon durability and power being too low to actually finish this fight unless you specifically broke the natural progression with amiibo.
This issue is further accentuated by the path the player would naturally take as the game is directing them. I could understand encountering a Major Test of Strength far to the northwest or something as that takes you in the polar opposite direction than the game is directing you, but the main questline sends you east to Kakariko, then further east to Hateno, and while in Hateno you would easily be given one of your first real combat-based sidequests that send you just south of Hateno to Hateno Beach where you’d see this island shrine sitting out there for you to reach. If the ONLY way to reach the shrine was jumping from that tall cliff, which itself most likely has a Test of Strength shrine, then I could understand the game’s thought process of giving you a smaller test before demonstrating that there are bigger tests, but with the player having been taught that the cryosis rune can be used to traverse bodies of water, albeit slowly, then you have to assume a low level player is going to try visiting this shrine and get wrecked.
The weird knock-on effect is that I’ve now completed the hardest challenge the game can throw at me. There are no Majorer or Majorest tests to encounter, only simpler ones or similar Major tests. The only challenges from here on out will be challenges of patience as I seek out specific materials for quests and upgrades, though I can think of one challenge nearby that could pose the greatest threat of all.
That will have to wait until next time though! I’ve warped back to Kakariko to speak with Impa in accordance with the game’s main questline, but once that’s done I intend to head back to the southern part of the map and make my way out to an island even further in the distance. See you in session 8 for the next great struggle!